This post begins with an apology to all our readers and supporters. In December 2015, we left Newfoundland to travel to India for a friend’s wedding, and two months later, continued on to Japan where we have been living ever since. During this time, we have been living in the moment as best we can while observing and taking notes on so many different housing and living choices.
In India, we were able to truly realize what we did and did not need in order to travel comfortably, and find purpose in what we were doing. Not surprisingly, this surmounted to very little. We found that as long as we had a shower, clean water to drink, and a place to sleep at night, we were totally fine. Food was never a problem. The things we brought in our packs (in no specific order), and could not compromise on, included the following:
[I included links to Amazon for both my American and Canadian readers – sorry to everyone else!!]
- Packing cubes (US, Canada)
- Quality multi-purpose soap (US, Canada)
- My tiny laptop (US, Canada)
- Tim’s iPhone and charger (US, Canada)
- Outlet adapter (US, Canada)
- 3 days worth of merino wool clothes
(US Men’s US Women’s, Canada Men’s Canada Women’s)
- A down jacket each (US Men’s US Women’s, Canada Men’s Canada Women’s)
- Camera (US, Canada)
- Journal (US, Canada)
- Boots (US, Canada) and Sandals (US, Canada)
- Toothbrush / toothpaste (US, Canada)
- Nail clippers (US, Canada)
- Towels (US, Canada)
As long as we had these things, we were ok. We actually had a bit more than that in our packs, and we did buy souvenirs (mostly for friends and family), but next time we know what we’d leave at home.We never missed having an expansive wardrobe or my shelves of books, nor did we feel our lives were lacking because we weren’t surrounded by our possessions.
In Japan, we were able to truly realize what we did and did not need in order to live comfortably, and find purpose in what we were doing. Not surprisingly, this amounted to very little. This sounds crazy, but our apartment in downtown Nagoya (the 4th largest city in Japan) is smaller, less convenient and less efficient than what our tiny house will be. It’s only 190 sq. ft. – 9’2″ by 20’8″. It was arranged for us by the school I’m teaching at, so we didn’t really have a choice in the matter if we wanted to be living together in the same apartment. But it was just fine for us, given our tiny aspirations and all.
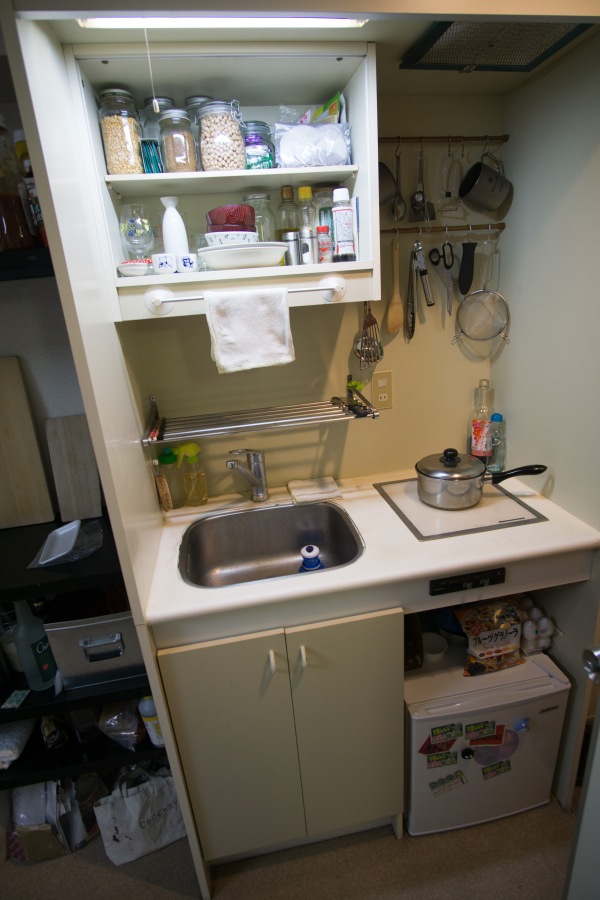
Our kitchen is less than the size of what our tiny house bathroom vanity will be. It consists of a stainless steel sink with a cupboard underneath and a one-burner induction stove top; only 6 inches of counter in between the two. Above the sink is a drying rack for dishes, built with stainless steel rods to allow for water to drip back down. Above this are two shelves, about 22 inches wide and 10 inches deep. Between the side of the shelving unit and the side wall of this odd little kitchen unit, we’ve put in spring-loaded expandable poles. On these, we’ve been able to hang most of our utensils and useful things with hooks. Outside of said utensils, we have two titanium sporks, two sets of chopsticks, two large shallow bowls, 3 small bowls, two soy sauce dishes, two wine glasses, two titanium mugs, one saucepan, one frying pan, one steel mixing bowl and one sake decanter with two small cups for drinking. That’s it! We put a suction-cup towel rack on the front of the shelving unit for dish towels. In the space under the stove top, there is a small, cube-shaped bar fridge with an interior volume of about 1.2 cubic feet (35 litres). That’s about enough space for 3 days worth of groceries.

Our bathroom is also smaller than what our tiny house bathroom will be. The apartment is quite old, probably built in the 1970s or thereabouts, so the bathroom is kind of a one-unit module that has the toilet box, sink, and tub all in one piece. Even the floor, walls and ceiling are moulded together to form one continuous plastic box. The sink faucet swivels and can reach out over the edge of the tub to fill it up if you want a bath. There is no real counter space, but we have used the space on top of the toilet box effectively with some organizers for our personal items. There is another shelf/rack thing above the toilet – same as the one that’s above the kitchen sink, built from steel rods. We keep extra supplies up there, and have hung some small decorative containers from it with hooks for extra storage. I hate all the plastic, but it works. One benefit from this set-up is that it acts like a wet-bath. You don’t have to worry about anything getting wet, and if water spills onto the floor, it’s slightly tilted towards the drain located under the sink (a gap exists at the bottom of the sink unit for this purpose). You’ll also notice a ceiling fan, and an access hatch in the ceiling for the pipes. We did have a leak once, so this was incredibly useful.
 The entrance way is a typical Genkan, a slightly sunken square of tiled flooring where you must awkwardly take your shoes off with no hands, while you have no where to put down your things, and simultaneously avoid trodding on anyone else’s shoes or the recycling that needs to be taken down to street level. I’m all for taking your shoes off, like you would being from Canada and all, but you need a bit of space! On one side of the Genkan is a closet of sorts, with multiple shelves inside supported by more of those spring-loaded expandable poles (read: they can’t hold a lot of weight). On the other side is a narrow rectangular alcove, with one shelf in the middle of it. We keep umbrellas and that sort of thing underneath it. A friend of ours who’s been living in Japan for a decade and has lived in these type of studio apartments before let us in a sweet bit of info – the front door is steel. That meant we were able to get magnetic hooks and hang up our sweaters and jackets. There’s literally no other place for them, so that was a win!
 As for the rest of the apartment, it’s just one ‘big’ room (lolz). When we arrived, there was a twin bed on a wooden frame, a modern-ish desk with filing cabinet and folding chair, and a small chest of 4 drawers – 1 drawer for Tim, 2 for me, and 1 for out of season clothes. We added a full length mirror, a metal shelving unit for storage and extended kitchen prep-space (the shelves are adjustable, so we put one right at counter height), a collapsible coffee table, a TV (for movies, we don’t have cable or satellite) and a small sectional couch. Everything we bought was second hand. Bought new, we acquired bed clothes and some canvas storage bins. There is a small balcony with just enough space to hang up your washing… I would have liked to put a small table and stools out there to enjoy the evening sun, but there’s really not enough space. The balcony has nice big glass sliding doors though, which let in lots of light. We’ve left them open from April – June and now again from October – December. During the winter, I can count on my hands how many times we turned the heater on, but in the summer, we used the air conditioner daily. It gets too bloody hot in this country for my constitution.
In conclusion, we have been living on a shoestring for almost exactly a year, and we’re really quite content. The things I miss the most are
- Having an oven
- Having a freezer
- Having enough space in the fridge for leftovers
- Personal things, like artwork, that remind us of our past and our travels
These, we know we need and plan to include in our tiny house. Outside that, Tim laments not bringing his safety razor. He bought a cheap one here in Japan, so it’s alright, but a nice quality steel safety razor body saves a load of money on disposable razors. He also wishes he brought a pair of jeans (I did :P). Tim has been doing a lot of online work with respect to his photography and building a website so he has relied on my laptop. It is nice to have your own personal laptop and not have to share with anyone, but again, we have made do and it hasn’t been unworkable. The same can be said about smartphones. We’ve shared just one the entire time, and it’s been fine. I’ve actually really enjoyed not having one on me when I leave the house, it has been very liberating. I could have gotten one in Japan, but I decided it was unnecessary. The only time it’s really a pain is if I go out after work with friends, but in that case, I just ask to borrow someone’s phone to shoot Tim a quick message to let him know.
We haven’t signed an internet contract for our apartment either – the whole time we’ve just been hot-spotting from Tim’s iPhone to the laptop. He bought a sim card with unlimited data when we arrived in Japan, so we never have to worry about going over. For a 6-month term, it costs $174 CAD (¥14,400). Although this method makes for very slow download speeds and inconvenient browsing, we choose to visit a local cafe once a week for heavy internet use, where we can relax with a coffee and piece of quiche. This might seem wasteful (you can make coffee at home!), but it’s an awesome substitution for having an internet bill.
For the sake of people who want more concrete evidence on this whole concept, i.e. ‘living tiny is a lifestyle choice that allows you to have so much more’, I’m going to continue to lay out costs and expenditures, specifically. I’ve read lots of articles that present tiny living as either extremely luxurious and trendy, or as a solution for homelessness, without any reference to people in between the two. I’m not criticizing either of these scenarios, tiny houses are means to so many different ends! But I think a lot of the criticism that is directed towards tiny houses / tiny living results from a lack of detailed information about how the lives of people on this path play out, and how these decisions translate practically. “The house is so cute, but are they really happy?”, they ask. I say yes, it requires some compromises, and yes, you do have to make some sacrifices; but, it also allows you to spend a lot more of your time (and money) having fun because you don’t have so much financial baggage!
Rent for us is $478 CAD (¥40,000) per month. Our monthly electric bill has come to an average of $34 CAD (¥2800), our gas bill is around $23 CAD (¥1900), and water works out to about $13 CAD (¥1100). Conservatively, groceries surmount to no more than $478 CAD (¥40,000) per month as well (for two people) but you can do it for less than that (we like treats). My subway fare to get to work and back every day comes to $124 CAD (¥10,400), but I am reimbursed for this by my employer.
So, our monthly utilities costs run us about $100. Including rent and food, in total, we pay ~$1,067 CAD (¥89,285) per month to live in Japan, with no frills. Remember, this covers two people. The total one-time investment we put into making our tiny space livable with furnishings came to $445 (¥37,200).
Now of course, there have been a few frills! We’ve gone on a week long camping and hitch-hiking trip through Aichi, Gifu, Nagano, and Niigata Prefectures. This cost us about $417 CAD (¥35,000). We went on another such trip down to Nara and on to Kobe, which cost a bit more (around $620 CAD (¥51,900)) because we stayed two nights in a hotel. We went to the Summer Sonic music festival in Osaka, which cost about $980 CAD (¥82,100) (including tickets). We went to Kyoto for Tim’s birthday in July, which cost only $380 CAD (¥31,800) because we camped both nights. For my birthday in November, we went to Tokyo, which was our most densely expensive trip – 3 days and 2 nights, no hitch-hiking or camping, and travel by bullet train, we spent $975 CAD (¥81,600) (we did A LOT of cool shit). Oh, and we hiked Mount Fuji in September, that trip cost us $465 (¥39,000). A few smaller trips include going to Ena, Gifu in the spring for rice planting and again for harvesting in the fall; and we went to the same town to stay overnight in an old traditional thatch-roofed inn in July. We went to a firefly festival about an hour away in June, and the Toyota Rock Festival in September. In October we went to an expo park to see a re-creation of the house from My Neighbour Totoro (Japanese animated movie). All of those experiences cost us between $60 and $120 CAD each (¥5,000 – ¥10,000). Halloween night, summer festivals in Nagoya, and various parties and evenings on the town were had as well.
Due to the fact that I still have 4 months left on my contract, I’m not yet allowed to divulge my salary, but I can tell you that my plan is to have $10,000 CAD saved by the time we leave to go home to Canada (after a little more than a year of working). It’s looking like this goal will be achieved even before it comes time to leave. We’ve lived extremely modestly (two people on only one salary), but have had a LOAD of fun times, as you can see.

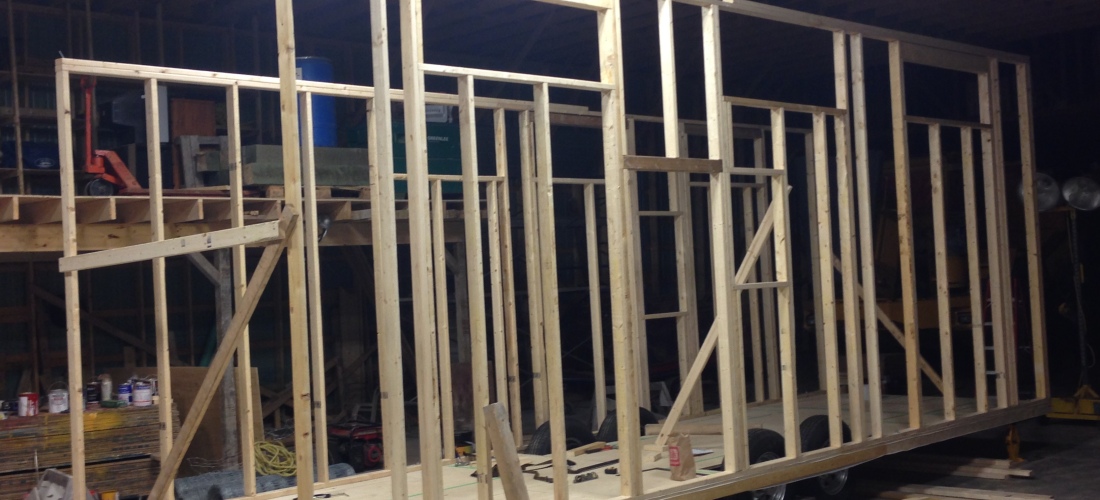
My point in all this is that by having a tiny house (and a tiny amount of possessions) you can actually live very large. This is our aim. This is our mentality. The past 12 months have proved to us that not only is it doable, it is enjoyable, and allows us to have so many more new experiences that we would otherwise not be able to afford. I feel ready, prepared, and motivated to return home and complete our build, so we can try out this life on Canadian soil. The part that blows my mind is that our tiny house will allow us so much more efficiency, beauty, and quality in our living space than our Japanese apartment does, and we will own it outright when it is finished. I will forever be grateful that I discovered this path as early on as I did, and didn’t waste my time and money on a McMansion, mortgage, and material possessions. Cheers to tiny house living!


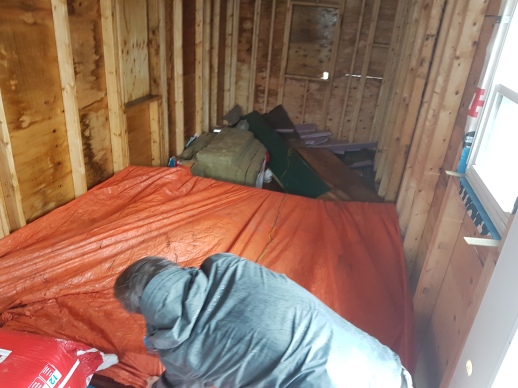 And that we did. We didn’t have much time, so I took on the wheel well project with some 2 x 4s and a big tarp while Tim took care of the lights and wiring. I literally just banged some boards together into a skeleton box, and stapled a tarp around it and then to the floor. Good to go.
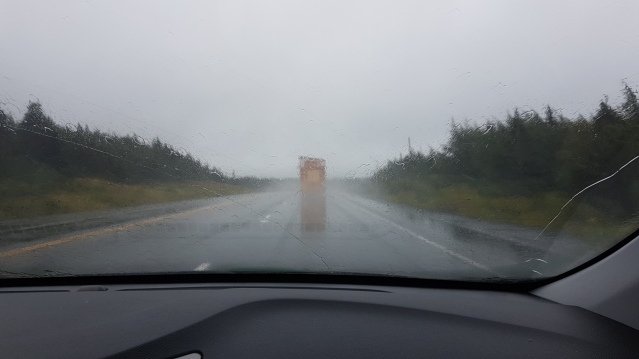 A minute later, there it was, rolling along leaving a big wake of rainwater behind it, looking very tiny indeed in the surrounding envelope of fog. There must have been at least 40 or 50 km of wind and more during the gusts. The entire ride was a blur with our eyes fixated on the tiny house in front of us. We defended the space directly behind it, not letting anyone separate us.
 When we arrived at our destination we had a short drive down a dirt road to the final parking place. The rain had washed a channel perpendicularly through the road, and probably had been doing so every time it rained for quite some time. The truck went over it, but as the tiny house wheels headed down into the miniature valley, the tail end of our trailer brought up on the road, suspending one set of tires, spinning, in mid air. Normally, I probably would not have reacted so calmly, but in that moment, it didn’t feel like a big deal at all. Maybe it was because I was in disbelief over how smoothly the journey had gone and in comparison to what could have gone wrong, it was really pretty small. We grabbed some 2 x 4s and strips of plywood that were lying around and built up the valley so that as the wheels went over it a second time they would be propped up higher, lending clearance space for the back of the tiny house.
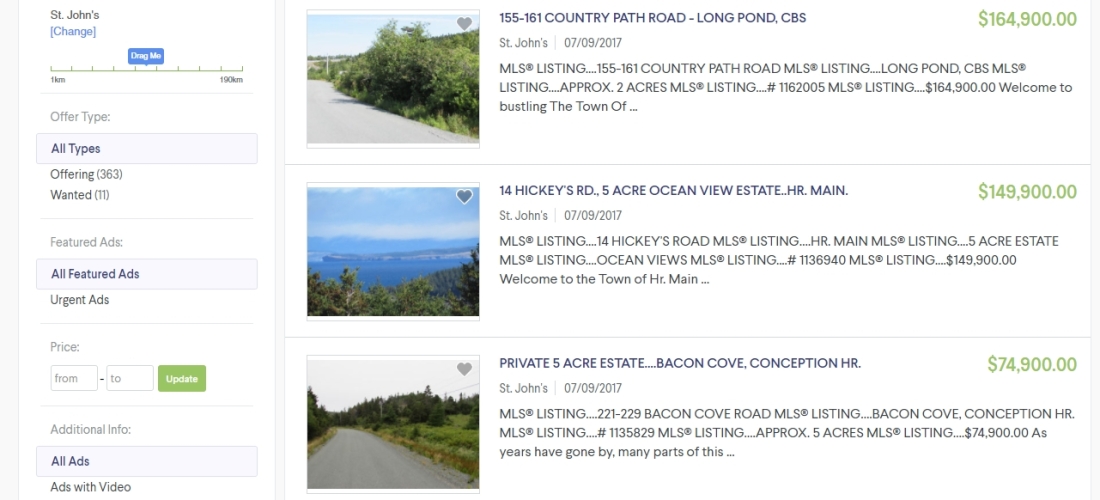


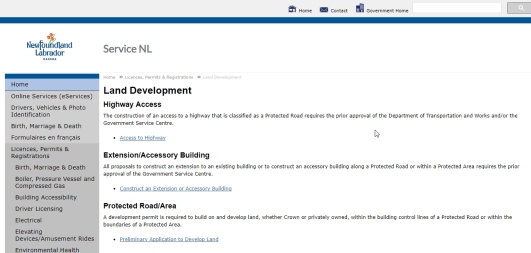 I did an archive search with our local service district, I inquired with local people who may have known the previous owners, and I consulted excavator operators to give me quotes on how much it would cost for the worst case scenario. I also downloaded and studied town plans, zoning regulations, and local by-laws that dictate how properties and buildings are allowed to be developed.
 Unfortunately, summertime in Newfoundland is not the best time to get things done that require the attention of government, since it is the only time for people to get outside and enjoy themselves. Newfoundlanders like to go out to the cabin, or out salmon fishing, or out to visit family around the bay during the few warm months we get after the seemingly never-ending winter we all endure here. There are weddings to attend and family vacations to embark on. You can’t blame them. Compounding this, it is definitely not the best time to expect action on a novel project such as ours when municipal elections are approaching quickly, and existing councils are finishing out their mandate with no guarantee that they will be returning for another 4 years of service.
 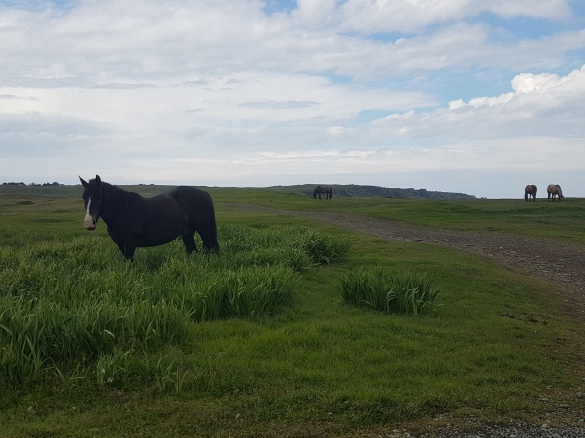 With this said though, we were able to sit down with the building committee of Pouch Cove, and the entire town council of Flatrock, and I must say, we got very positive responses from both. I can’t advocate enough for taking the time to inform and educate the leaders in your community on why tiny houses are good and safe, and why you want to live in one. I was nervous going into these presentations since my experience dealing with government officials, be it municipal, provincial, or federal, is very limited.And you always hear such negative things about politicians and their ability to get things done. But you know what, I am feeling quite optimistic at this point in our journey, having spoken with the people we have, and seeing the evolution of their opinions.


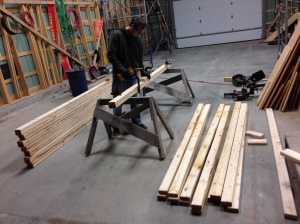 Unfortunately, the hardware store didn’t have any 4″ x 4″s in stock, and we needed to start this work right away. On the bright side, they gave us a great solution – laminating two 2″ x 4″s together to form a slightly slimmer, but structurally stronger version of a 4″ x 4″. We used 2.5″ zinc coated deck screws every 12 inches (and a pair at each end) along with a thick bead of PL Premium between the two pieces to ensure a strong bond.


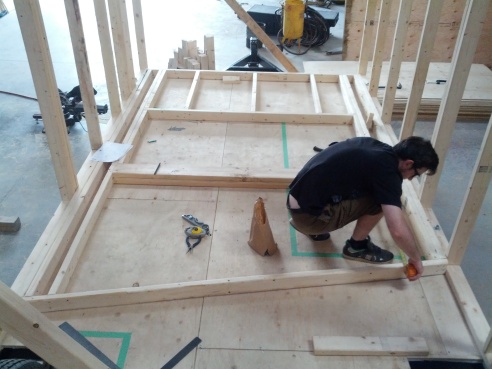


 8′ side. The top and bottom (the 4′ sides) are square. Each sheet is also


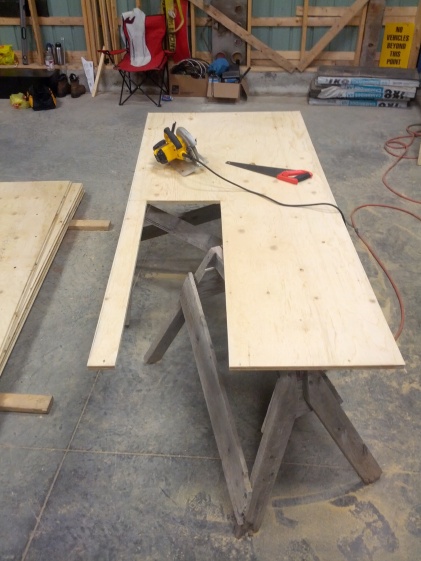 allow for our wheel wells. It seems that with rough carpentry, it doesn’t matter how precise you try to be, it’s impossible to have everything just so. What a positively fantastic exercise for the nit picky hair-splitter in me!